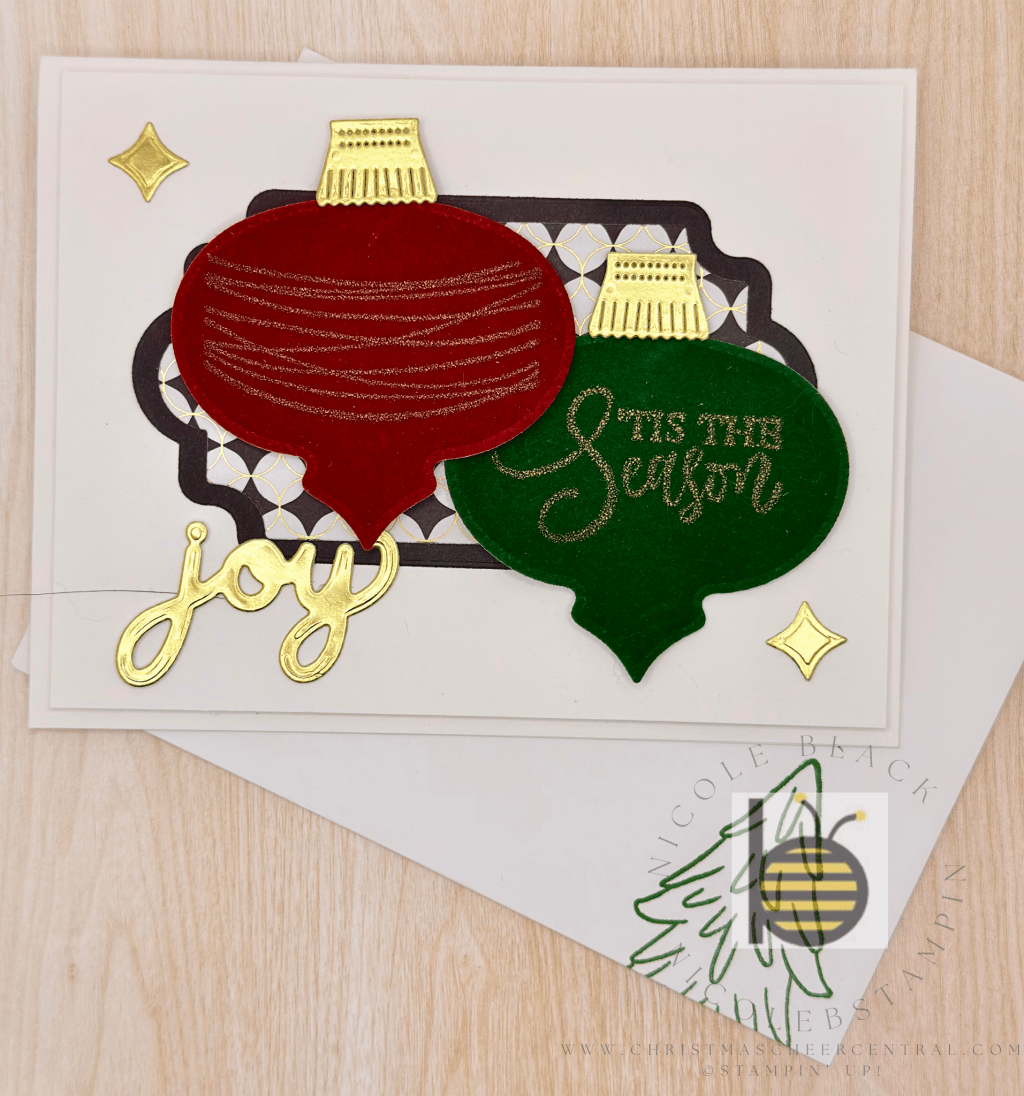
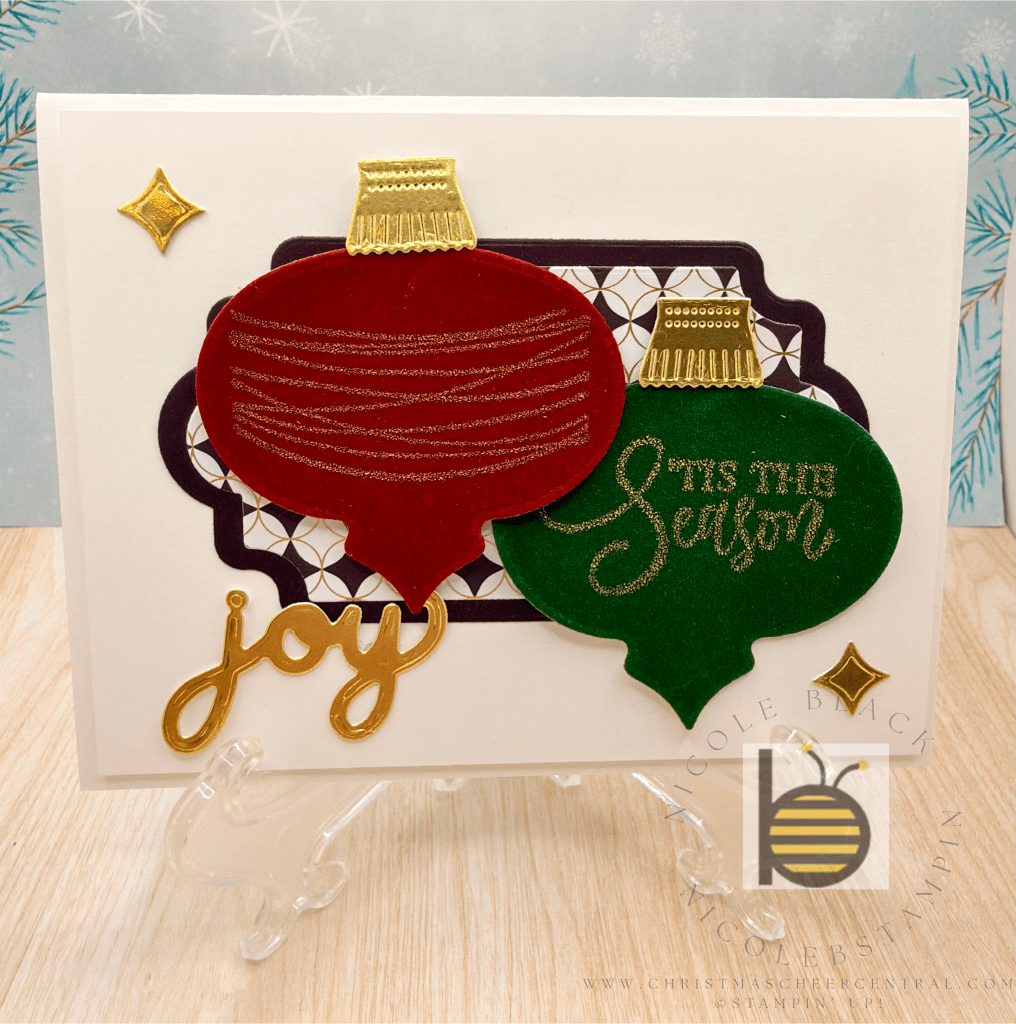
There’s nothing quite like a handmade Christmas card—especially one that combines beautiful textures and metallic shine. This design features luxurious Velvet paper paired with radiant Gold Foil for a look that is both simple and undeniably classy. Whether you’re making a batch for friends or crafting a special one for someone dear, this card delivers elegance without the fuss.

Prepare Your Pieces
Begin by die cutting all your elements. Once you have everything ready, emboss the Velvet ornaments with Gold embossing powder. Yes, you can emboss on Velvet—and it looks stunning! The heat brings out a rich texture and creates a gorgeous contrast with the gold.
Assemble the Card
Follow these easy steps to put your card together:
- Add Dimensionals to the white layer and adhere it to your card base.
- Tape the two labels together, then attach them to the card front.
- Adhere the green ornament directly to the card front.
- Add Dimensionals to the red ornament and adhere it for added depth.
- Use Glue Dots (or your favorite adhesive) to secure the gold elements in place.
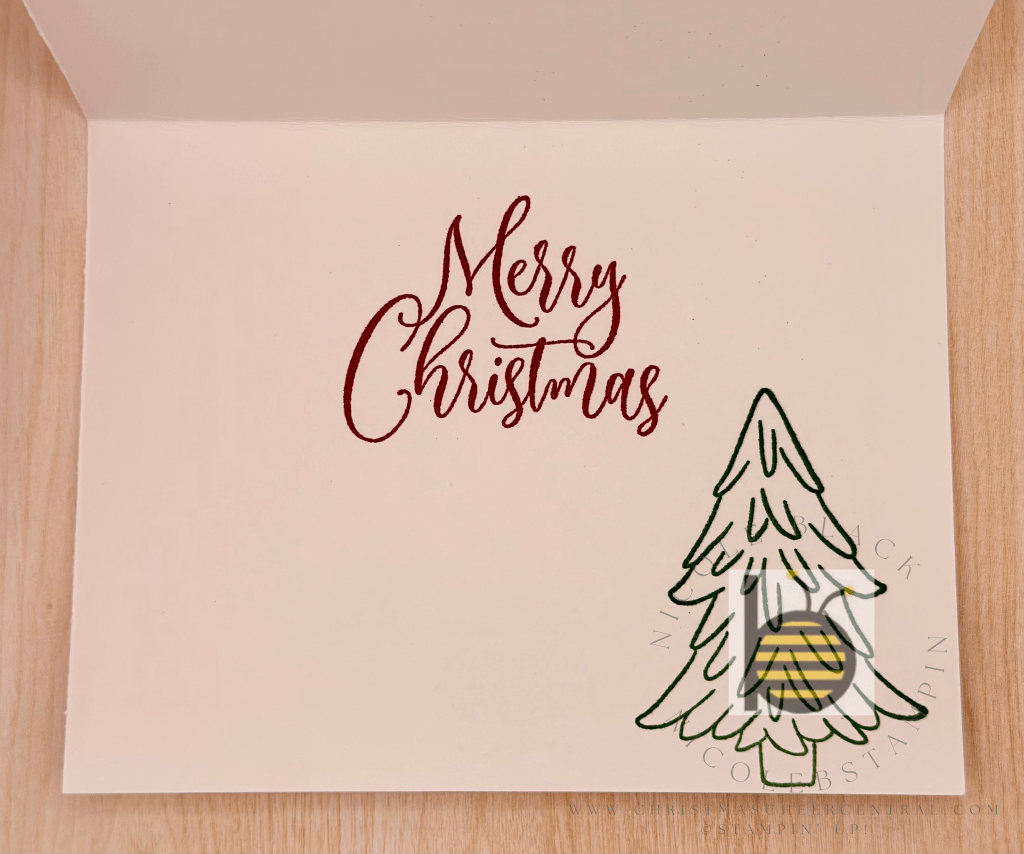
- Finish the inside with a couple of coordinating stamps from the Ornamental Christmas set.
This card may come together quickly, but the result is anything but simple. The mix of Velvet texture and Gold Foil adds a luxurious feel that makes this design truly special. It’s the kind of handmade card that people keep and display long after the holidays. I hope you enjoy creating this elegant Christmas card as much as I did!
Cardstock Cuts for this project:
- Basic White Thick – 8-1/2″ x 5-1/2″ scored at 4-1/4
- Basic White – 5-1/4″ x 4″ panel
- Basic Black – 4-1/2″ x 2-3/4″ for Label die
- Gold Foil – 3″ x 2″ for Joy, Diamonds and Ornament Top dies
- Modern Christmas DSP – 4″ x 2-1/2″ for Label die
- All Season Velvet – 3″ x 3″ in Red and Green for Ornament Die


Leave a comment