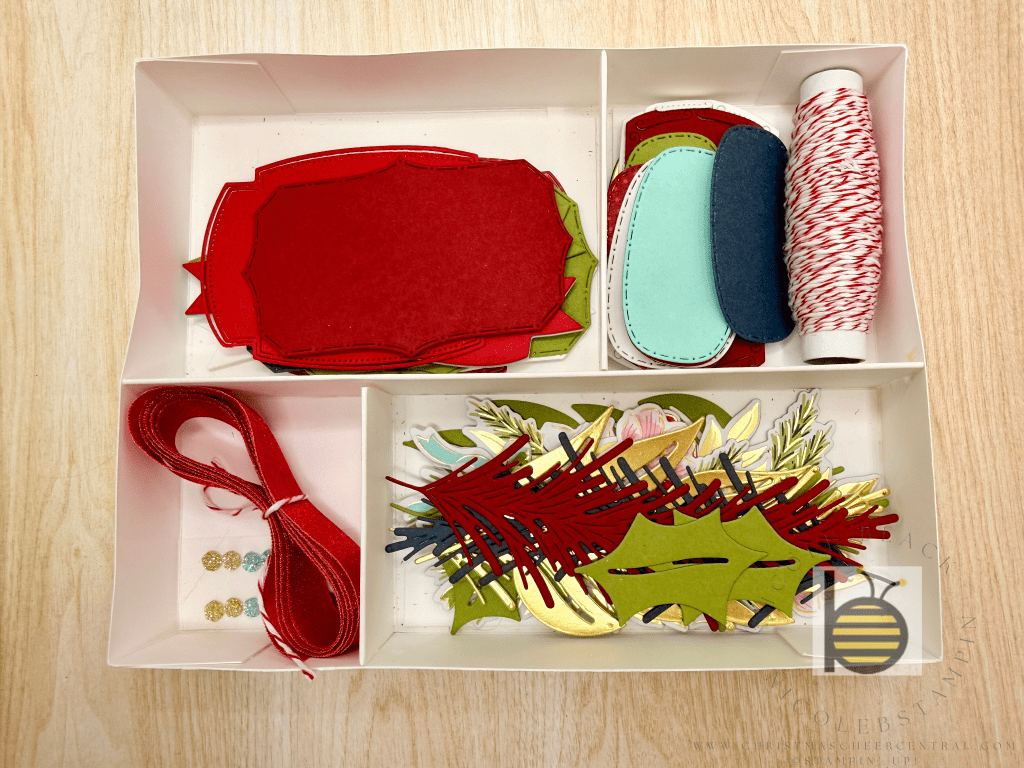
In Stampin’ Up’s Mini Catalog on page 26 they show a box of tags to be given as a gift. I decided I had to make this project—and I ended up having so much fun with it!
The box can be a little tricky at first, but don’t worry—I’ve included step-by-step instructions and a full video tutorial to walk you through every part of the assembly.

Box Template
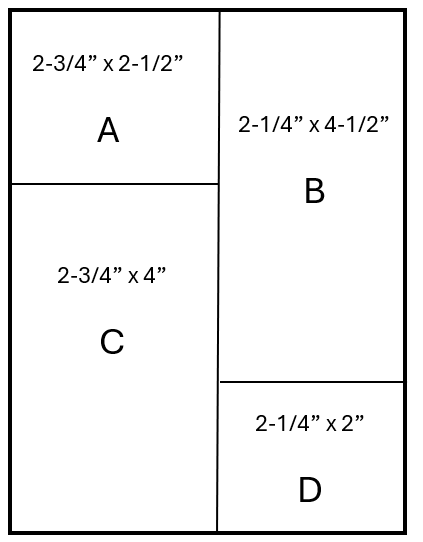
Before you begin, I recommend measuring and sketching the template directly onto your Box Base, using the score lines as the outer edges. This will help keep everything precise as you work.
Assemble the Box
Box Base
- Cut and score the Basic White Thick cardstock.
- Cut one side of each of the four corner squares to create tabs.
- Fold along all the score lines.
- Add Tear-N-Tape to the outside of each tab.
- Adhere the sides together to form an open box.
Dividers
- Cut and score the Basic White Thick cardstock.
- Fold along all score lines to form a small wall with two flaps that will adhere to the bottom of the box.
- Add Tear-N-Tape to three of the four panels (each end and one center panel).
- Start by attaching the Long Divider in the center of the box base, aligning it with your drawn guideline.
- Next, attach the Left and Right Dividers—test fit them first and trim the ends if needed.
- Using a strong glue (fabric glue works wonderfully), secure the ends of each divider to the sides of the box base.
Inserts
- Cut and score the Basic White Thick cardstock.
- Place Tear-N-Tape on one side of each insert piece.
- Adhere them to the bottom of the box in their corresponding sections.
These not only clean up the inside of the box but also hide your pencil marks and divider tabs.
Lid
- Cut and score the Window Sheet.
- Cut one side of each of the four corner squares to form tabs.
- Fold along all score lines.
- Use a strong, clear glue to attach the tabs and assemble the lid.
Finishing Touches
This is where the fun really begins!
- Add ribbon or decorative trim to the lid.
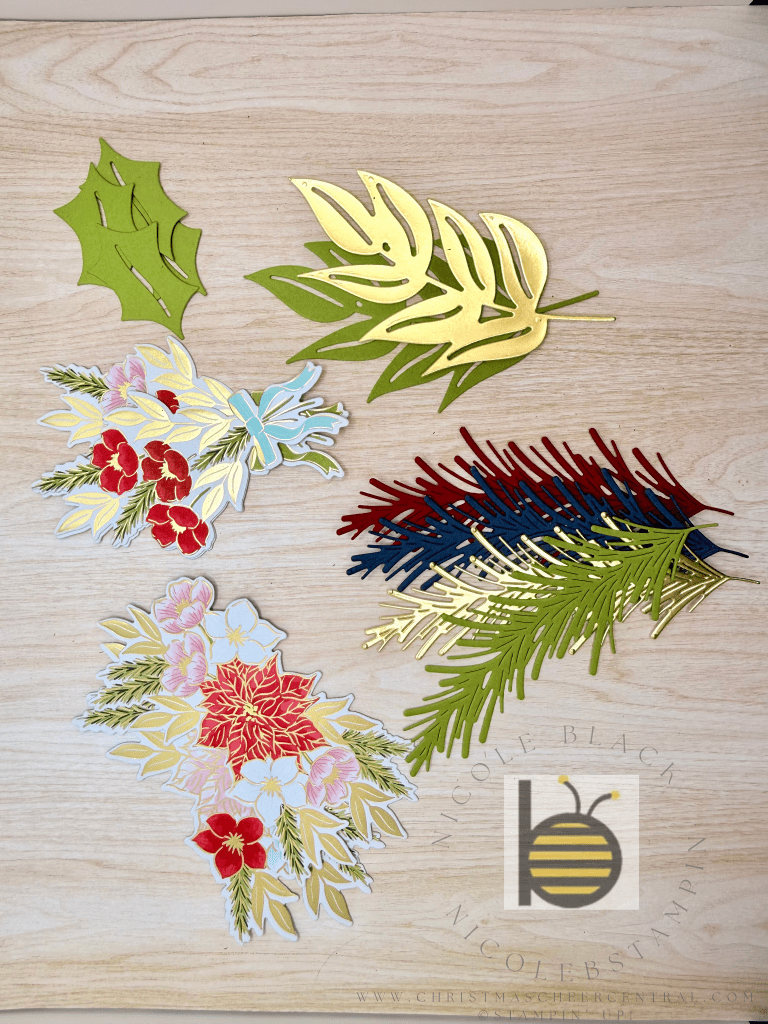
- Die-cut tags and embellishments to fill your box.
- Include coordinating ribbons so the tags are ready to tie onto gifts.
Honestly, I think I had the most fun creating all the little elements to tuck inside the box—I even made an extra set of tags for myself!

🎥 Watch the video tutorial here to assemble the box:
Cardstock Cuts for this project:
- Box Base – 8-1/2″ x 7″, score at 1″ on all sides
- Long Divider – 6-1/2″ x 3″, score at 1/2″, 1-1/2″, 2-1/2″
- Left Divider – 2-3/4″ x 3″, score at 1/2″, 1-1/2″, 2-1/2″
- Right Divider – 2-1/4″ x 3″, score at 1/2″, 1-1/2″, 2-1/2″
- Insert A – 2-5/8″ x 2-3/8″
- Insert B – 2-1/8″ x 4-3/8″
- Insert C – 2-5/8″ x 3-7/8″
- Insert D – 2-1/8″ x 1-7/8″
- Lid (Window Sheet) – 8-1/2″ x 7″, score at 7/8″ on all sides
Stampin’ Up! products used to create the box:


Stampin’ Up! products used to create the box:


Price: $16.50


Leave a comment