I know it’s only September, but I’ve already started working on my Halloween cards, gifts, and décor projects. Over the next couple of weeks, I’ll be sharing my spooky creations with you—so stay tuned for lots of festive fun!

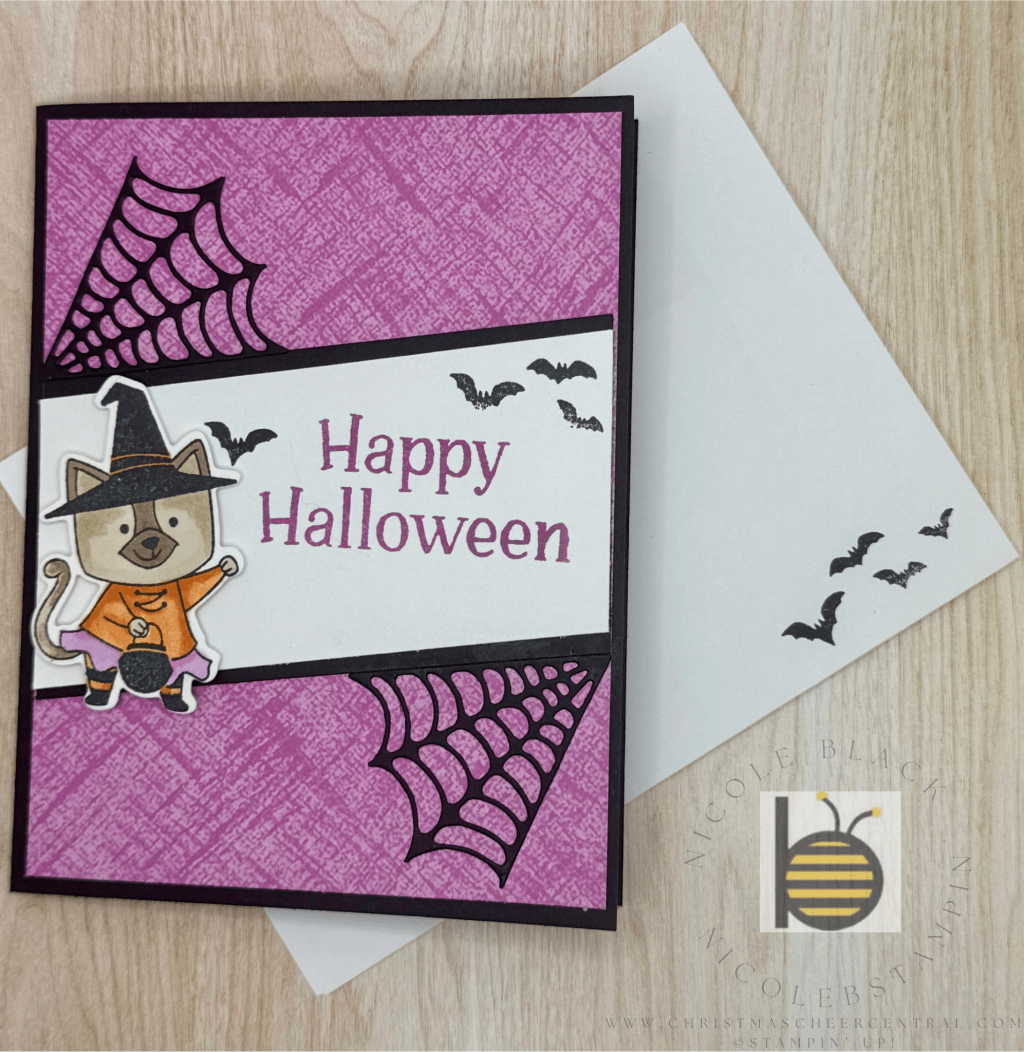
When I spotted the Spooky Halloween Bundle, it immediately went on my must-have list—mainly because of the cat! 🐈⬛ The very first project I made was a card featuring that adorable kitty along with the playful Spooky Sweet Designer Series Paper.
Tips for Creating This Card:
- For the angled panel: I used my Stampin’ Up! Paper Trimmer to cut a 2″ panel of Basic White at an angle. Then I flipped it, lined it up to the 4″ mark, and cut the other end. That piece became my template for trimming the Basic Black layer at the same angle—so easy!
- For the cat: I stamped her on a 2-1/2″ x 2″ piece of Basic White and colored her with Stampin’ Blends that coordinate with the Designer Series Paper. After die cutting, I popped her up with Dimensionals for some extra dimension.
The best part? You can switch things up! Try different patterns from the Designer Series Paper or swap the witchy cat for the Frankenstein pup (seriously, so cute!). And don’t forget—this DSP comes with punch-outs, so you can make a quick-and-easy version of this card using those ready-made characters.
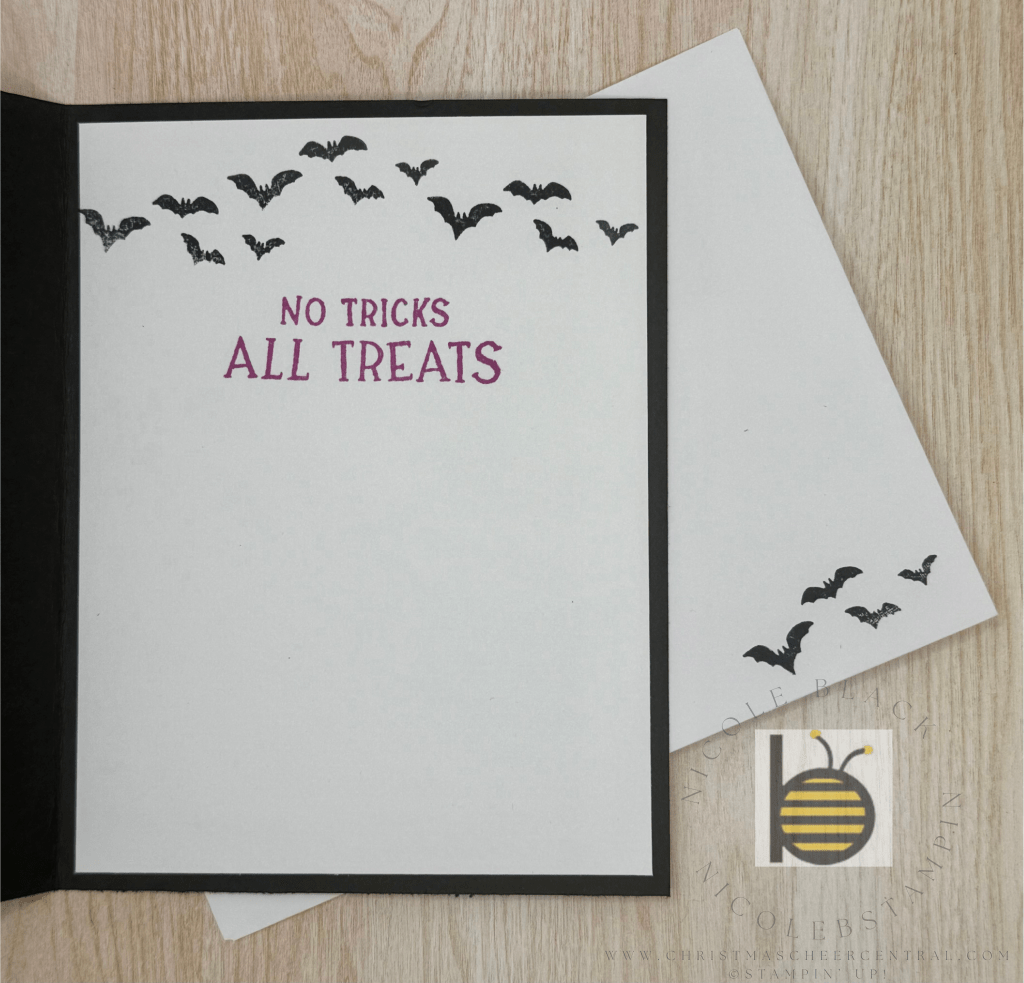
Finally, I added a few bats to bring the whole card together. They’re the perfect spooky finishing touch!
I hope this gets you in the Halloween spirit—I know it’s got me excited for all the crafty projects to come.
Cardstock Cuts for this project:
- Basic Black – 8-1/2″ x 5-1/2″ scored at 4-1/4, 2-1/4″ x 4″ (cut at an angle), 4″ x 2″ for spider web dies
- Basic White – 5-1/4″ x 4″ panel for inside, 2″ x 4″ (cut at an angle), 2-1/2″ x 2″ for cat die
- Spooky Sweet DSP – 5-1/4″ x 4 panel


Leave a comment